Nissan Rogue: Vehicle identification
Vehicle Identification Number (VIN) plate
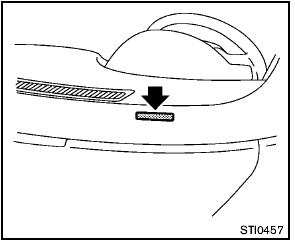
The vehicle identification number plate is attached as shown. This number is the identification for your vehicle and is used in the vehicle registration.
Vehicle identification number (chassis number)
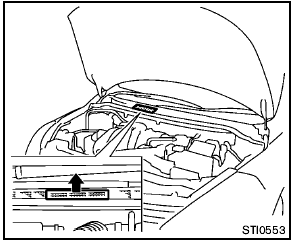
The vehicle identification number is located as shown.
Remove the cover to access the number.
Engine serial number
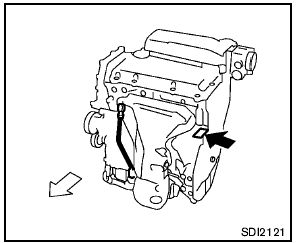
The number is stamped on the engine as shown.
F.M.V.S.S./C.M.V.S.S. certification label
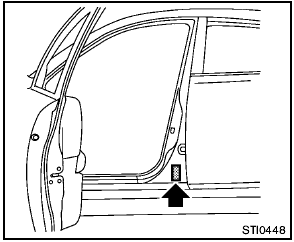
The Federal/Canadian Motor Vehicle Safety Standards (F.M.V.S.S./C.M.V.S.S.) certification label is affixed as shown. This label contains valuable vehicle information, such as: Gross Vehicle Weight Ratings (GVWR), Gross Axle Weight Rating (GAWR), month and year of manufacture, Vehicle Identification Number (VIN), etc. Review it carefully.
Emission control information label
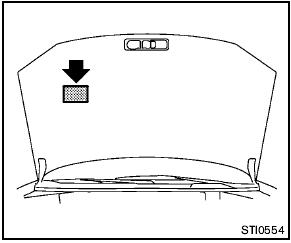
The emission control information label is attached to the underside of the hood as shown.
Tire and loading information label
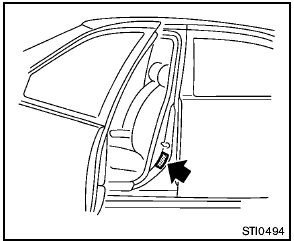
The cold tire pressure is shown on the Tire and Loading Information label affixed to the pillar as illustrated.
Air conditioner specification label
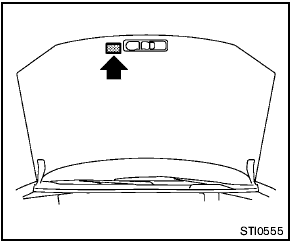
The air conditioner specification label is attached to the underside of the hood as shown.
Installing front license plate
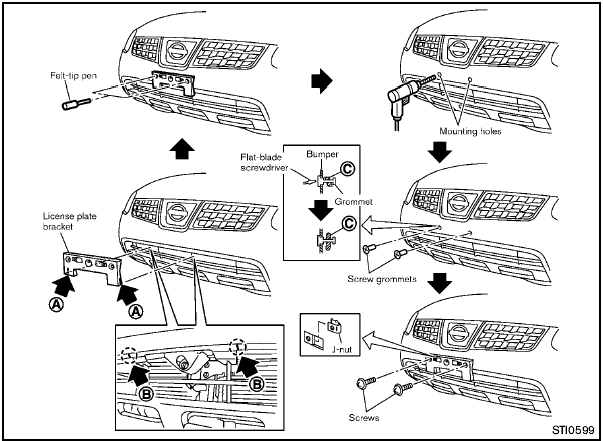
Use the following steps to mount the license
plate:
Before mounting the license plate, confirm that
the following parts are enclosed in the plastic
bag.
- License plate bracket
- J-nut 6 2
- Screw 6 2
- Screw grommet 6 2
1. Temporarily place the license plate bracket by aligning the lower part A of it with the lines B on the bumper.
2. Mark the pilot hole points with a felt-tip pen through the holes of the license plate bracket.
3. Remove the license plate bracket.
4. Carefully drill two pilot holes using a 0.39 in
(10 mm) drill bit at the marked locations. (Be
sure that the drill only goes through the
fascia, or damage to the nut may
occur.)
5. Insert grommets into the hole on the fascia.
6. Insert a flat-blade screwdriver into the grommet hole to add 908 turn onto the part C .
7. Insert a J-nut into the license plate bracket before placing the license plate bracket on the fascia.
8. Install the license plate bracket with screws.
9. Install the license plate with bolts that are no longer than 0.55 in (14 mm).
See also:
Interior lights
Do not use for extended periods of time
with the engine stopped. This could
result in a discharged battery. ...
Washing the exterior
Wash your vehicle regularly with cool or lukewarm water and a neutral
pH shampoo, such as Motorcraft Detail Wash (ZC-3-A), which is
available from your authorized dealer.
• Never use strong household detergents or soap, such as dish washing
or ...

 Specifications